

Laser cutting is one of the most dependable technologies that is applied in workshops today, particularly in Ontario as shops deal with anything from custom signs to precision parts. Even so, machine ownership is merely half the battle. The real challenge lies in learning how to adjust your laser cutting settings so that each cut is smooth, accurate, and cost-effective. Different materials react differently to the laser, and knowing what to adjust saves time, reduces waste, and improves quality.
Below are some helpful tips for getting the best results converting a digital vector outline to a finished cut through standard materials.
Table of Contents
1. General Pre-Start Rules
Before going into material-specific advice, it is worth recalling a few general rules:
- Clean focus: Simply ensure your laser focus lens is clean and properly aligned. A dirty or poorly aligned lens will produce uneven burns or wasted cuts.
- Test first: Make some small test cuts at varying speeds and power settings before cutting a full sheet. A few minutes of testing usually saves hours of rework.
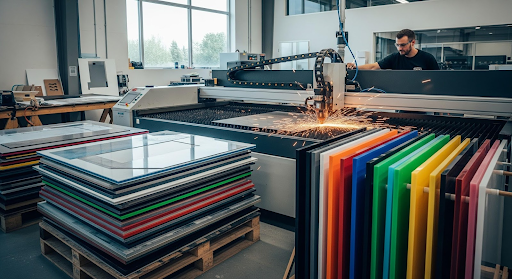
- Air assist: If your machine has air assist, use it. It helps reduce scorching and keeps the cutting area clear of smoke and debris.
These basics create a strong foundation no matter what material you’re working with.
2. Cutting Wood
Wood is among the most commonly laser-cut materials, but it can be problematic due to its inherent irregularities. The softwoods such as pine cut faster, while the hardwoods such as oak or maple cut harder.
- Power and speed: Begin with a medium speed and average power. Too much power will scorch the edges, and a dark, blackened appearance will result.
- Grain direction: Always be aware of the direction of the wood grain. Cross-grain cuts can be set slightly differently than cutting with the grain.
- Plywood: If possible, work with laser-friendly plywood. Regular plywood can have glues that are resistant to cuts and result in uneven cuts.
Tip: To leave a cleaner appearance, apply masking tape to the surface before cutting. It keeps the burn marks away and peels off easily after cutting.
3. Acrylic and Plastics
Acrylic is in great demand for signs, displays, and ornaments because it cuts with a smooth edge when it cuts cleanly. But plastics also emit fumes, so ventilation is a requirement.
- Clear acrylic: Optimum cut with slower speed and more power to produce a flame-polished edge.
- Colored acrylic: Usually requires slightly different settings, so cut a small corner first and then watch.
- Avoid PVC: Certain plastics such as PVC are not recommended to laser cut since they emit toxic fumes. Always double check for material safety before using.
Tip: In heavy acrylic, slow down the cutting speed and use more air assist to avoid edge melting.
4. Metals
Metals are stronger and need more industrial grade laser cutters. Steel, aluminum, and stainless steel are popular metals.
- Steel: Cuts best with a constant, high-energy beam. Thin sheets cut more easily than thick plates.
- Aluminum: Reflected surfaces tend to trap some machines, so make sure your cutter can handle it.
- Stainless steel: Frequently needs assist gases such as oxygen or nitrogen to cut cleanly.
Tip: Strip the surface oil or rust first. Oily surfaces absorb the beam unevenly and yield poor results.
5. Fabrics and Textiles
Laser cutting of fabrics is universally applied in fashion, upholstery, and technical textiles. It creates accurate patterns without fraying.
- Synthetic fabrics: Cut well as the edges melt a little, sealing against fraying.
- Natural fabrics: Can burn when the power is too high (examples: cotton or wool). Begin with less power and more speed.
- Layering: Cut slowly and gently while cutting multiple layers at once because fabric thickness will result in uneven cutting.
Tip: Utilize a honeycomb bed to keep the fabric from shifting or curling out with heat.
6. Paper and Cardboard
Paper is notoriously easy but needs close calibration to avoid burning risks or over-burning.
- Speed and power: Use extremely high speed and low power. The goal is to cut cleanly without scorching the sheet.
- Thickness: Thin paper cuts well, while corrugated cardboard may require multiple passes depending on density.
- Detail: Laser cutting works well for intricate paper designs, but reduces speed a touch to maintain sharp edges on small designs.
Tip: Monitor paper jobs closely. Even when the correct settings are used, paper will ignite very quickly if not kept an eye on.
7. Glass and Ceramics
Laser cutting will not cut glass directly, but can engrave it. Engraving is usually the preferred method for workshops making signage or custom decoration.
- Depth of engraving: Low power and increased speed for shallow, frosted finish.
- Coated glass: Sometimes engraves cleaner than uncoated glass.
- Ceramics: Also engravable, but not by most off-the-self laser systems.
Tip: Place a wet paper towel on the surface when engraving in order to control heat and reduce cracking.
8. Balancing Cost and Quality
Parameter optimization is not just achieving an optimal cut but also defending the workshop bottom line. You’re losing production if you’re too slow. You waste energy and reduce the life of the machine if you have too much power. Achieving the middle ground between speed, power, and quality is what makes it cost-saving while satisfying customers.
9. Creating a Reference Library
Each workshop is required to maintain a record of what was successful with each material. With time, the reference library proves invaluable. Rather than experimenting or starting over on every project, you can immediately refer to tried-and-true figures. It accelerates production and saves trial and error.
Looking Ahead
As more and more Ontario shops are employing laser cutting, mastery of machine settings is increasingly becoming an art form in itself, equal to design. Optimal settings are saving material, preventing damage to equipment, and getting jobs progressing from vector to cut. If you’re searching for laser cutting Kitchener, you’ll find that many local shops have developed this skill, allowing them to work with all kinds of materials efficiently and with confidence.